This project has had its fair share of stops and starts, but I am ecstatic to tell you that the laundry room makeover is finally complete! (And my husband is ecstatic too because every time I would work on this project, he’d do a pseudo eye roll and say, “I don’t get it. It’s a laundry room.” #sigh #men)
Before I share the before and after pics of the space, let’s talk a little bit about why I wanted to tackle this makeover, along with the specifics of the room that I wanted to change and things that needed to stay the same for budgetary reasons.
This post contains affiliate links. That means that if you click on a link and/or purchase something you love from the list below, I’ll get a teeny tiny commission because of that sale. It won’t cost you anything extra, but it WILL help me keep Kate Decorates up and running. Thank you for your support! To read my full disclosure policy, please click here.
Why Our Laundry Room Needed a Makeover
Laundry is such an un-fun task to begin with — yet with two small children it’s never ending. I know you guys can relate! My hope was that by sprucing up our laundry room, it would make washing our towels and socks just a bit more tolerable.
When we moved in, the laundry room was nice enough, but also pretty builder basic, if you will. Laminate flooring, a strange brownish-greenish-red laminate countertop, along with white and cream cabinets (Seriously, who does that?!).
Was it absolutely the worst laundry room I’ve ever seen? Nope. Did it feel kinda sterile and impersonal? Absolutely. And that’s why I set out to give this space a budget-friendly makeover.
Someday I’d love to give this space an even bigger makeover — you know, the swoon-worthy kind with gorgeous tiling and fixtures that you find on Pinterest — but for now I aimed to keep it easy-ish on the wallet. The reality is that I don’t have a ton of money right now to spend on a laundry room makeover, and my general school of thought on home improvement projects is that I’d like to make investments in the rooms that our visitors frequent (so, ya know, NOT our laundry room).
My Approach to the Laundry Room Makeover
I love DIY projects — or rather, I often love the thought of DIY projects — but I’ve gotta tell ya, I am not the most patient person ever, and I’m also a perfectionist. And just like you, I have a job, children, hobbies of my own, and a zillion other things on my to-do list that are competing for my time and attention.
How to do a DIY Laundry Room Makeover
These factors have a major impact on the projects I choose (and don’t choose) to do. Any DIY project I tackle must be 1) appropriate for any skill level, 2) fairly quick to complete, 3) pretty much guaranteed to look great when I am done (read: you really CAN’T mess it up). I’m not asking for much, right?!
What I Changed in Our Outdated Laundry Room
Therefore, I tackled mostly painting projects in our space, and also tried my hand at installing peel-and-stick vinyl floor tile, as well as removable wallpaper. I also changed quite a few of my original plans from when I first started thinking about this project last fall. Funny how that happens, isn’t it? Oh, the best-laid plans, as the saying goes……
I’ll be sharing additional posts with more details on each of these mini-projects — plus my reviews of using the peel-and-stick vinyl tile and removable wallpaper — but in the meantime, here’s a short overview of how I spruced up our laundry room:
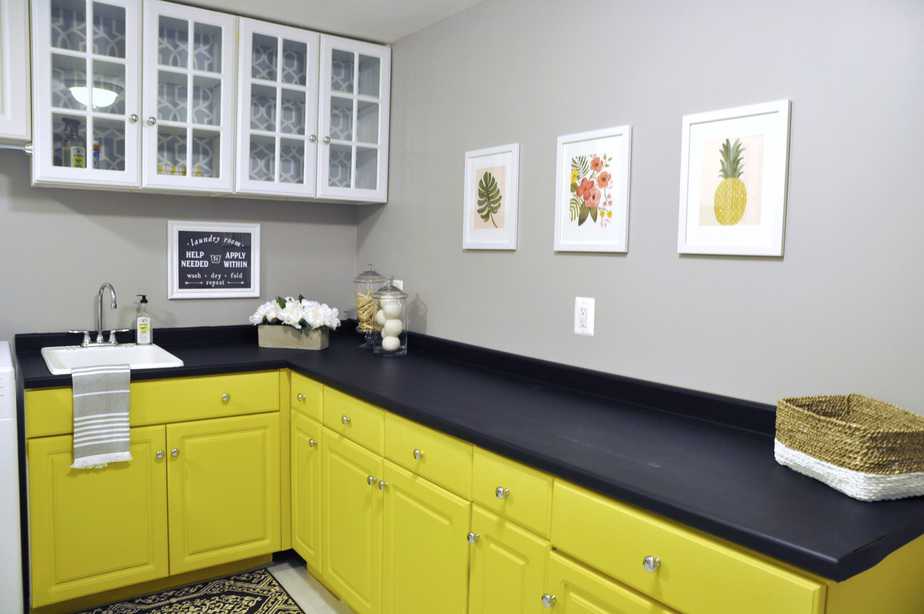
- Painted the cabinets using leftover Annie Sloan chalk paint that I initially purchased for a different project (I already wrote about this portion of the project, and shared the full tutorial here)
- Painted the ugly laminate countertops using chalkboard paint (you can get the full scoop on this super easy DIY project here)
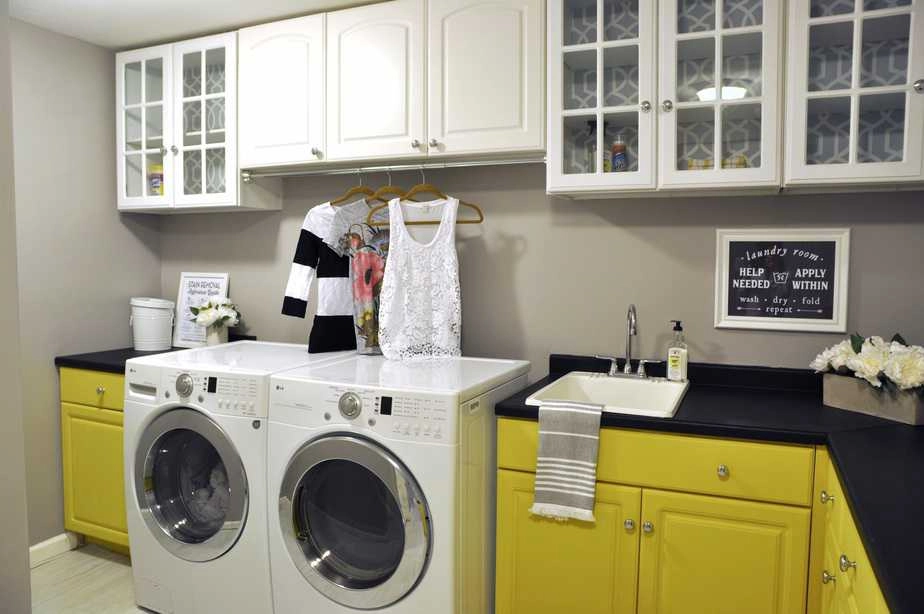
- Wallpapered the back of our upper cabinets with removable wallpaper (I used this lovely gray and white trellis wallpaper, which I purchased on Amazon)
- Installed new vinyl peel-and-stick tile over the old linoleum (here are my very honest thoughts on using peel-and-stick tile)
- Figured out a way to hide the unsightly washer and dryer hookups that were previously in plain view (thank you, $15 shower tension rod!)
- Added some decorative accessories like a clock, some artwork, and a retro-style craft supply storage bin turned lint collector
What I Might Change or Add to the Laundry Room in the Future
- The hideous fluorescent light fixtures. These really are THE WORST. But I’m not completely sure as to what I want to replace those guys with, so I’m holding off on giving our laundry room lighting a refresh for now.
- Additional space for drying clothes. We line dry a ton of stuff in our house (yes, I’m a little crazy like that) and right now I have a drying rack that lives in our “bonus room.” It was taking up too much floor space in the laundry room, so it was relocated a while ago. The solution is okay for now, but someday I’d like to have more drying space in our actual laundry room. But again, because I would need so much drying space, I need to think about how I’m going to tackle this particular challenge in a way that’s actually going to work for us over the long haul.
The Budget-Friendly Laundry Room Makeover Reveal!
Now that I’ve talked your ear off, are you ready to see the before and after pics? Let’s get to it.
First, shall we all cringe at the sight of our boring (not to mention messy) laundry room pre-makeover? Please have a look:
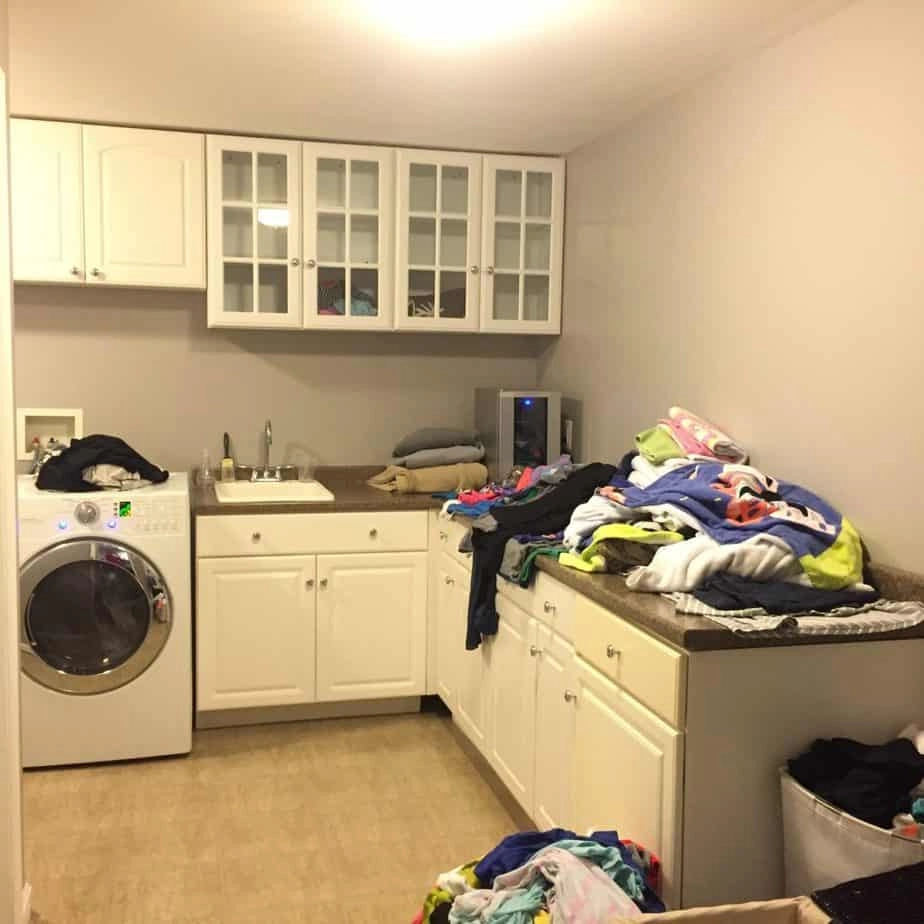
I’m so giddy I can hardly stand it.
- Related: Room reveal: Powder room decorating on a budget
- Related: Small mud room makeover REVEAL
- Related: Weekend DIY: Our $100 Entryway Makeover
Here’s our new laundry room:


How Much Does a Budget-Friendly Laundry Room Makeover Cost?
All in, we spent just under $200. Because the budget was an important factor throughout the project, I want to share the breakdown of the money I spent on our laundry room makeover. Thankfully I was able to take advantage of products I already owned, along with some good sales and coupons that helped me to keep costs down.
Here’s a list of everything I used and/or purchased for the makeover, along with the cost of each item:
- Annie Sloan Chalk Paint for lower cabinets: $0, leftover from a previous project
- Cabinet hardware: I left the original hardware as is
- Chalkboard paint for countertops: $14.99
- Paint brushes, rollers, and other painting supplies: $0 (it feels like we own a zillion of these items, thanks to my husband’s love of taking field trips to Lowe’s and The Home Depot)
- Peel-and-stick wallpaper for upper cabinets: $39.99
- Tension shower rod turned clothes drying rack: $12
- Peel-and-stick vinyl floor tile: $79.98 (I purchased two boxes of the tile at $39.99 each)
- “Laundry: Help Wanted” print: $6.99 (via Jane.com)
- “Stain removal” print: $6.99 (via Jane.com)
- Pineapple, leaf and floral prints: $0 (I cut these from an old Rifle Paper Co. calendar, which is now on super sale)
- Picture frames:$0, already owned
- Clothespins: $0, already owned
- Wool dryer balls: $8
- Clear glass apothecary jars: $0, already owned thanks to my aunt who gave me ALL the apothecary jars she used for a birthday party candy bar a few years ago
- Faux peonies in white vase: $19.99
- Faux peonies in cement planter: $0, already owned
- White retro-style craft storage turned lint bin: $4.99
- Yellow wall clock: $0, received as a gift
- Total cost for our laundry room makeover: $193.92
The Laundry Room Makeover Verdict
Remember the oh-so-skeptical husband I mentioned earlier? Well, I think he’s a whole lot less skeptical of the value of the room makeover now because our laundry piles in the basement are currently the smallest they have ever been since we moved into this house over two years ago. Yessssssss.
Don’t get me wrong: It’s not as though I’m going to be adding “laundry” to my list of hobbies anytime soon, but I most definitely don’t dread hanging out in the basement and folding clothes like I used to do.
I’m happy with how the makeover turned out. One of these days I’ll get my gorgeous designer laundry room, but I can absolutely say that our new space is a HUGE improvement over what it looked like when we moved in. And I did it all for less than $200.
So there you have it: It’s totally possible to give your laundry room a facelift by tackling a few paint projects, shopping within your home, and taking on a couple DIYs that do NOT involve scary power tools! I promise you — if I can do it, so can you.


Fixin15
Tuesday 31st of December 2019
Can you possibly tell us the name/brand of the peel and stick tile you used? Looks good.
Kate
Wednesday 1st of January 2020
Hi there -- I used Armstrong 12x12 peel-and-stick vinyl floor tiles, which I purchased at Lowes. Before using peel-and-stick floor tile, I recommend you read this post, which covers 3 things I wish I had known before I started the install: https://www.katedecorates.co/easy-diy/consider-peel-and-stick-vinyl-floor-tile-diy/
jeanie
Sunday 29th of December 2019
What brand and style of peel and stick tile did you use?
Kate
Wednesday 1st of January 2020
Hi Jeanie -- I used Armstrong 12x12 peel-and-stick vinyl floor tiles. Before using peel-and-stick floor tile, I recommend you read this post, which covers 3 things I wish I had known before I started the install: https://www.katedecorates.co/easy-diy/consider-peel-and-stick-vinyl-floor-tile-diy/
Alice Morgan
Monday 10th of June 2019
love this whole post and your details are impeccable! and you "tell it like it is" - simple, to the point directions on each part of the remodel project. getting ready to paint the vanity in a half-bath downstairs. Plan to use Behr chalk paint in Tin White and use the primer and top coat. Question - do you have the paint color you used for your gray walls? I want something like it because the bath is so small. so would probably go for same color, just a shade lighter. want to use the color for a bedroom upstairs too. You may have this info in another post also, do you have a recommendation on a 1. primer (i.e. Kilz or Vinsser 123) to cover a bedroom with peach colored walls and 2. wall paint - Lowe's, HD, Sherwin, Porter? thanks Alice
Kate
Thursday 13th of June 2019
Hi Alice - Thank you so much for the kind words about the post and the laundry room makeover! Love that you're using Behr chalk paint for your vanity -- I actually wrote a post about my review of Behr chalk paint after I, too, used it to paint my kids' bathroom vanity. So far, it's holding up great and I love the color. Here are my thoughts on the paint if you're interested: https://www.katedecorates.co/easy-diy/my-review-of-behr-chalk-paint/
As for the gray on the walls in the laundry room, the previous owners chose the color so I have no idea what the brand/shade is. Sorry! We usually use Kilz for priming and my favorite paint brands (in no particular order) are Valspar, Behr and Benjamin Moore. Sherwin Williams has some gorgeous colors but I've had application/quality issues with their paint in the past -- maybe I'm the anomaly there, but I've used SW paint a couple times and haven't been overly thrilled with the results.
Decorating on a Budget: 6 Ideas for a Budget Friendly Room Refresh
Wednesday 19th of April 2017
[…] exactly sure how to do it, then you definitely should visit her site! She recently made over her laundry room for under $200! It is such a fun laundry room, I just had to share it with you! Check it out below and make sure […]
Tricia Wolff
Thursday 16th of March 2017
Love the make over. The pops of color make this a space I'd want to work in. Quick question....are the hanging clothes what you are doing to hide the washer/dryer hook-up? Mine is so ugly and distracting I'd love to do something to minimize that.
Kate
Thursday 16th of March 2017
Thanks so much! Yep, you're exactly right -- the tension shower curtain rod is what I used to hide the washer and dryer hookups. They are smack in the middle of that wall for ALL to see. Terrible placement. :) It's a win-win with the tension rod, though -- the ugly hookups are hidden, plus I get some extra drying space out of it!