All right, it’s time for my week three update as part of the $100 Room Challenge! I’m a little late in posting given that both kiddos were sick earlier this week but thankfully everyone is back to 100%, so I was able to tackle the largest DIY project I had planned as part of this makeover.
If you missed my posts for weeks one and two of the challenge, you can check out those posts right here:
The largest DIY project I had planned for the room makeover was painting abstract stripes on all walls to mimic the look of wallpaper.
See the aqua striped pattern below? That’s some fabric that I found via Spoonflower that inspired this idea:

For the kids’ bathroom, I decided to paint abstract stripes on all walls of the bathroom to make the space appear larger (and the ceilings appear higher). These stripes would also look great as an accent on just one wall in a room.
I chose to paint the stripes as opposed to using actual wallpaper because 1) this approach was far more budget-friendly and 2) let’s be real, I am far too impatient and lazy to try and hang real wallpaper. (Please tell me I’m not alone on this one…..right?!)
Turns out that Monica at East Coast Creative had completed a similar project recently — which I think looks great — so that gave me a confidence boost in terms of tackling this and having it look, well, not like a giant mess.
Now that I’ve completed the project, I am happy to report that I’m really pleased with the way it turned out. And it was SO easy. Much easier than I suspected, in fact. Thank goodness!
However, it’s not quite as simple as just grabbing a paint brush and freehanding some random stripes on your wall.
By taking a few critical steps to prep the wall beforehand, the painting process will go faster and most important, you’ll be MUCH happier with the outcome of the project.
This post contains affiliate links. To read my full disclosure policy, please click here.
![]()
Small, 1″ chip brushes (purchase several because you’ll want to swap them out as you work your way around the room)
12″ level with ruler (here’s the one I have)
Pencil
Satin-finish paint in your color of choice; a quart is probably sufficient unless you’re painting a very large room
![]()
- {Optional, depending on your particular room} Remove any shelves, towel bars, artwork, etc. from the wall that you will not be re-hanging. Spackle the holes that those items left behind; let dry. Take a selfie (just kidding, that’s optional). Sand down, and then touch up the paint with your base color. Let dry.

- Decide how far apart you want your stripes to be. I spaced mine 3″ apart.
- Starting at the ceiling using your level and a pencil, hold your level parallel to the ceiling, placing it up against the ceiling. Make vertical pencil marks at 3″, 6″, 9″ and 12″. These don’t need to be huge pencil marks. You just need to add enough of a mark to serve as a guide for you so that you can keep your lines fairly straight while painting.
- Repeat this process and move your level down the wall. For standard 8″ ceilings, you probably want pencil lines every foot to guide your painting of each stripe.
- Using your chip brush and paint, make a vertical line starting at the ceiling and ending at the floor. You may not have enough paint to make a full stripe without stopping, and that’s totally fine. Here’s a quick video I made for you to give you an idea of the right way to paint each stripe:
That’s it! Keep painting your stripes until each wall is complete. In our small bathroom — excluding step #1 above — this entire process took me about 4 hours from start to finish.
The prep work making the pencil lines took the longest. The painting went by quite quickly.
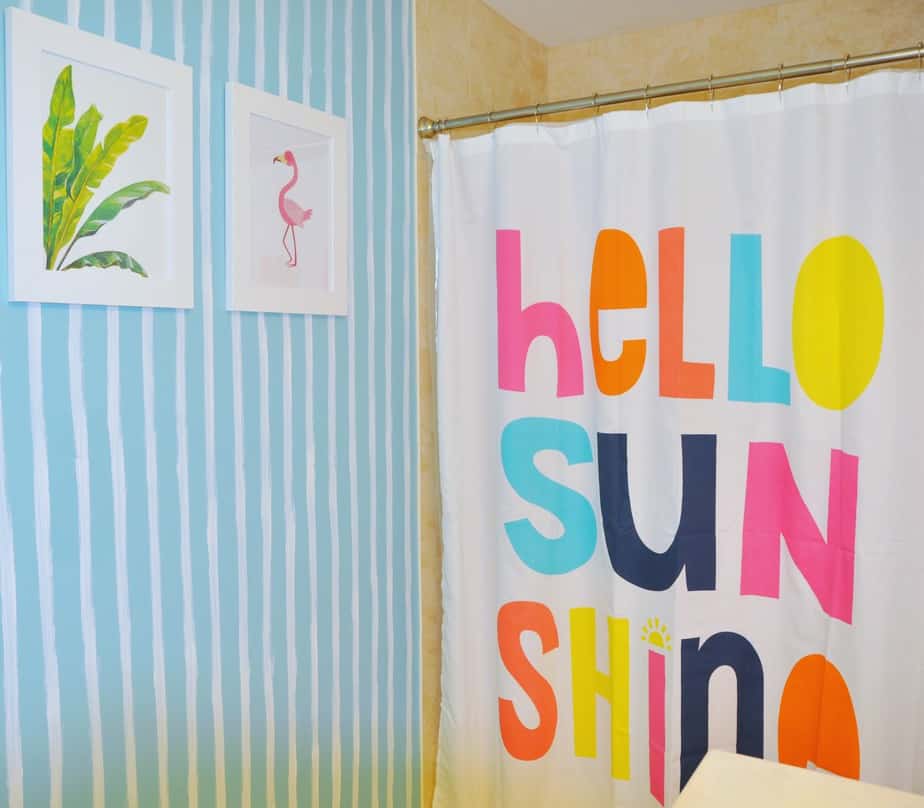
Here’s a sneak peek at one of the finished walls in the kids’ bathroom, complete with the new shower curtain and new artwork:
Check back later this week for the full reveal of our new kids’ bathroom!


Erin
Monday 31st of July 2017
The stripes are so fun! Looks great!
Kate
Monday 31st of July 2017
Thank you, Erin!
Meredith @ The Palette Muse
Thursday 27th of July 2017
You're not alone in not wanting to wallpaper! I love this solution and can't wait to see the rest of the room!
Kate
Friday 28th of July 2017
Thank you, Meredith! Final reveal coming soon. :)
arthritis100
Monday 24th of July 2017
Preparation is key to painting, especially on what you are doing with abstracts. I can't wait to see the final week. Maria
Kate
Tuesday 25th of July 2017
Thank you so much, Maria! You're totally right about the importance of preparation. I was quite tempted to just jump in without doing any prep work, but I knew that I'd be disappointed with the finished product. So glad I took the time to plan and draw out my lines before reaching for a paint brush!
Bethany Crisp
Monday 24th of July 2017
Such a FUN space! This is such a great idea and you are too cute friend!
Kate
Monday 24th of July 2017
Thanks so much, Bethany! I am now thinking what other walls in my house I can paint to create "faux" wallpaper. I'm sure my husband will be super excited to hear this... ;-)
Erin @ Lemons, Lavender, & Laundry
Monday 24th of July 2017
That looks SO good! Great tip on the using the level and measuring. I'd be the one trying to freehand (impatient) and I'm sure it would be a disaster :)
Kate
Monday 24th of July 2017
Ha, I am SO that person who would have tried to freehand, BUT I know myself and know that approach would have not gone well AT ALL. I will admit it was hard to be patient as I was drawing those pencil lines, although I'm so happy I went that route!